Sunday 25 September 2011

Devonshire Honey Cake

Last week was my friend Messner's birthday, which of course means the opportunity to make a cake. Since he hasn't got a particularly sweet tooth, I wanted to avoid frosting, and to stick to a more traditional kind of bake. Flicking through the BBC Good Food guide to Cakes and Bakes for inspiration, I saw this delicious-looking Devonshire Honey Cake. I had to adapt the recipe due to a dearth of the requisite ingredients, but I've been told by a (Devonian) friend who has tried the original that this version makes more of an impact on the tastebuds. So here's my take on a classic....

Ingredients:

250g honey (about half a jar)
3tblsp golden syrup
175g unsalted butter
75g dark muscovado sugar
2 large eggs, beaten
250g self-raising flour

Method:
1. Pre-heat oven to 140-160 degrees celcius, and grease and line an 8" springform cake pan.

2. Cut the butter into chunks, and melt slowly in a pan on the hob with about three quarters of the honey, all the golden syrup and the sugar. One the ingredients are completely meted and mixed, increase the temperature and boil the liquid for about a minute. Set aside to cool for about 10-15 minutes. (If you put a bit of water in the sink then sit the pan in there it will be cool enough sooner).

3. Once, the mixture is cool enough to dunk your finger in for three seconds or so, you will be OK to add the eggs without them cooking. Stir them into the mixture.

4. Sift the flour into a large mixing bowl, then gradually add the honey mixture, beating all the time, until you have a smooth, runny batter. 

5. Pour into the prepared tin, and bake for around an hour, until the cake is tanned, well risen, and springs back when you poke it, and when a skewer comes out clean.

6. Put the cake on a wire rack to cool, and after 5-10 minutes, when it is cool enough to handle, gently warm half of the remaining honey (you can do this on the hob, or with about 3 x 10 second bursts in the microwave, stirring in between), and use it to glaze the top of the cake.

7. Leave the cake to cool some more, and for the honey to absorb in. Then warm the last of the honey, and use this to create a second layer of honey glaze on the top of the cake.


This cake is perfect to serve with a nice cup of Earl Grey, but I can imagine it's amaxing served with custard as well. Unfortunately, I forgot to take a picture before presenting it to my friend, and ten minutes later (and despite only four people being present), this was the only picture I could get.....


I suppose that speaks for itself?!

Wednesday 7 September 2011

Superfood Salad

I wonder whether I have mentioned before that I despise salad? I just think that in principle, anything with that much water content can't really be described as food.

But it turns out that a lot of my prejudice can be explained away by the pitiful quality and lack of imagination shown in most British salads nowadays. So this little beauty takes its inspiration from further afield. There probably won't be much more of the year left when we can seriously consider salad consumtion as a viable food choice, so this particular recipe is a good season-straddler. I got the recipe from a book owned by one of my friends, which I'll credit just as soon as I get her to remind me which book it came from...


Puy lentil salad with soy beans, sugar snaps and broccoli

Ingredients:
200g Puy lentils
1 litre hot vegetable stock
200g tenderstem broccoli
140g frozen soy beans, thawed
1 red chilli, seeded and finely sliced

For the dressing:
2 tblsp sesame oil
juice of 1 lemon
1 garlic clove, chopped
2 1/2 tblsp soy sauce
3cm knob ginger, finely grated
1 tblsp clear honey (replace this with 1/2 tsp sugar dissolved in a tblsp boiling water for a vegan variant)


Method:
1. Rinse the lentils very well to get rid of any gritty residue. Boil the lentils in the stock for about 15 minuted until just cooked. Drain, then tip into a large bowl.

2. Bring a pan of salted water to the boil, throw in the broccoli for one minute, add the beans and sugar snap peas for one minute more. Drain, then cool under cold water. Pat dry, and add to the bowl with the lentils.

3. Mix together the dressing ingredients, with whatever seasoning required (if any). Pour over the salad, then mix in well with the sliced chilli.

4. Serve up, and revel in just how delicious salad can be!

Sunday 4 September 2011

The Fake British Bake-Off (Mary Berry's Tarte Au Citron)

A few weeks ago, a friend sent me a message with a wonderful TV viewing tip - The Great British Bake-Off, featuring my all-time culinary idol, Mary Berry. I have to admit to hearing of her greatness rather late in life, when, in 2007, I moved into a shared house with a very fun jazz trumpeter, who was the proud owner of her “Complete Cookbook”. Together with our other lovely housemate, Messner, we threw ourselves wholeheartedly into ‘Mary Berry Mondays’, when we’d take it in turns to try out some of her recipes.

But I digress... what with Belarus, wedding cakes, and a couple of conferences to prepare for, I managed to completely forget about the series until it became the primary topic of conversation over lunch with an old school friend this week. It was definitely worth the wait. We jumped in at episode 2 – pastries – a topic I must admit to having little expertise in. The competitors had to make their own interpretations of particular pastry types, including a classic quiche, and some sweet tartes. After that, came the technical challenge - to recreate Mary Berry’s Tarte au Citron. As I watched, I could feel my mouth beginning to water uncontrollably. Since moving out from the trumpeter and Messner, I have acquired my own copy of Mary Berry’s Complete Cookbook, so here’s my take on her delicious lemon tarte.


Mary Berry’s Tarte Au Citron
 
Ingredients:
9 eggs
300ml (1/2 pint) double cream
Grated zest and juice of 5 large lemons
375g (12 oz) caster sugar
Icing sugar for dusting
Lemon twists or zest to decorate

Pastry:
250g (8 oz) plain flour
125g (4oz) chilled butter, cubed
60g (2 oz) caster sugar
1 egg

28cm (11in) loose-bottomed fluted flan tin
Baking beans


Method:
1. Make the pastry: rub butter into lour in a large bowl, until it reaches the consistency of breadcrumbs.

2. Stir in the caster sugar, then bind together with the egg to make a soft, pliable dough. Wrap in cling film and chill for 30mins.

3. Roll out the dough on a lightly loured surface and use to line the flan tin. Prick gently then bake blind for 10 minutes at 200 degrees Celsius. Usually I use dried chick peas on top of tin foil when I bake blind. However, this flan is very large and my chick peas barely made an impact, so instead, I weighted the pastry down with a few small ramekins.

4. Remove the baking beans (or ramekins!) and foil, then bake the pastry shell for another 5 minutes until it had dried out (no soggy bottoms for Mary!)

5. Remove the pastry case from the oven, and reduce the temperature to 180 degrees Celsius.

6. Beat the eggs in a bowl and add the cream, lemon zest and juice, and caster sugar. Stir until smooth, then pour into the pastry shell.

7. Bake for 35-40 minutes until the lemon filling has set.

8. Leave to cool a little, then decorate with icing sugar and lemon twists or zest.

Friday 2 September 2011

More family favourites - Home-made strawberry jam

Not to suggest that all of the time spent at my mother's was taken up with culinary endavours, but we did set ourselves the task of creating a batch of the world's most delicious strawberry jam. For my mother, who is an accomplished and enthusiastic jam maker, I think this was not such a great challenge. However, I'm more of a chutney fan myself, and this was my first foray into the sticky world of jam-making. So here's what we did...

Home-made strawberry jam

Ingredients:
1kg strawberries, hulled (large ones halved or quartered)
500g granulated sugar
550g jam sugar with added pectin
150ml lemon juice

About 4 sterilised jars (still warm from the sterilisation process)


Method:
1.       Put a saucer into the fridge. This cool saucer will be used later to test for setting point.

2.       Put 200g of strawberries into a pan, with about half of the granulated sugar, and mash gently.


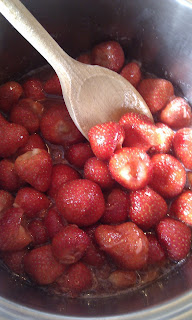
   3.When warmed through, add the rest of the strawberries. Gently bring to simmering point, stirring carefully with a wooden spoon to stop it sticking. Simmer for about 10 minutes, or until the strawberries are softened.


   4. Add the rest of the sugar, stirring continuously.

   5. Once the sugar has dissolved, add the lemon juice. Bring back to the boil, and boil rapidly for 12-15 minutes, stirring occasionally.

   6. Test for setting point. If there is any scum on top of the jam, add a small knob of butter and stir in, as this will disperse the scum.

To test for setting point:
Put a blob of your jam onto a cool saucer. Leave for one minute, then push gently with your finger. If a clear path remains, then the jam is ready. If the jam is not ready, keep boiling and testing in increments of three minutes.

Decant into sterilised jars (still warm), seal and turn upside down and back again to improve the seal.


For me it seems that strawberry jam's main purpose in life (in my life, at least) is to team up with the decadent creaminess of Cornish clotted cream atop a delicious fruit scone, and to spend its brief existence being admired and devoured with equal delight.

I was very happy to seal this jam's fate.